In the second part of our series on how we make the FLIT-16, we’re taking you behind the scenes at the factory!
We’ll delve into some of the processes we use to build the FLIT-16, showing you how we transform raw metal into finished bike parts. Watch the video below for an overview of the first stages of manufacture.
Beginning manufacture
In the first part of our series, we left off after our pilot manufacturing run, when we built our fourth and final prototype, Blaze.
Pilot runs help to show up any kinks in the manufacturing process before we give the go-ahead for final production. As you can see from the steps below, mistakes at this point are expensive and can take a long time to fix, so we must get things right!
Forming and shaping parts
As you may know, we make the FLIT-16 frame from lightweight and corrosion-resistant aluminium. The metal arrives at the factory in its raw state, either as solid blocks or tubes.
We use aluminium tubes to form many of the most recognisable frame parts, such as the top tube or chainstays. As you have already seen in the video above, these tubes are cut and bent into shape using specialist machines.
The other most common process that we use to transform the blocks of raw metal into the shapes that we need is CNC milling. During this process, a CNC mill gradually removes material from the metal block until only the desired shape remains. It is particularly useful for making complicated parts, such as hinges.
As you can imagine, CNC milling is fairly time-consuming: it can take a few hours for a single part to emerge from an aluminium block. This means that producing these bike parts takes up a significant chunk of the production timeline.
We produce smaller plastic parts, such as the rear light holder on the battery and the feet on which the folded bike sits, using another process called injection moulding. This involves injecting a custom mould with molten plastic under pressure.
Once we have shaped and formed all of the frame parts, it’s time for welding!
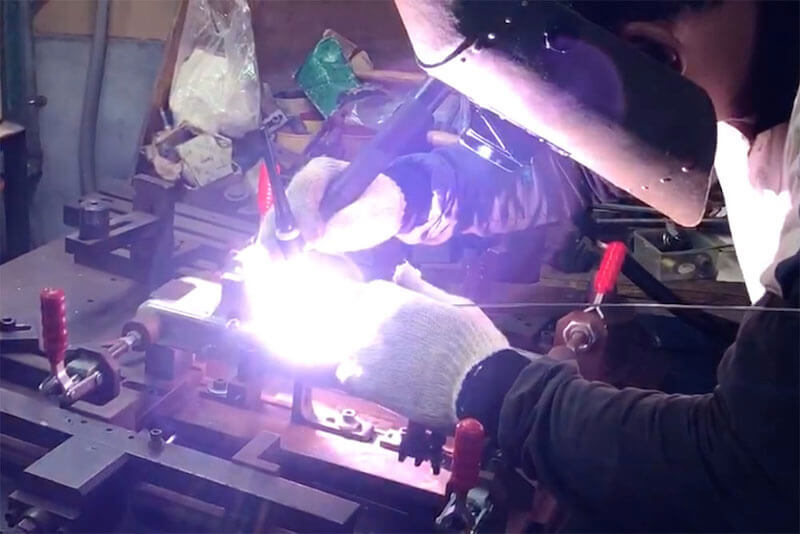
Welding
Before any welding is performed, we have to clean the parts by dipping them in baths of acid. This removes any residue on the surface, making sure that the weld is really strong.
After cleaning, the parts must be loaded into fixtures, which are special manufacturing tools that keep the parts in place whilst we weld.
Some of the welds involve performing the process twice in order to achieve a smoother, better-looking finish. This is known as smooth welding.
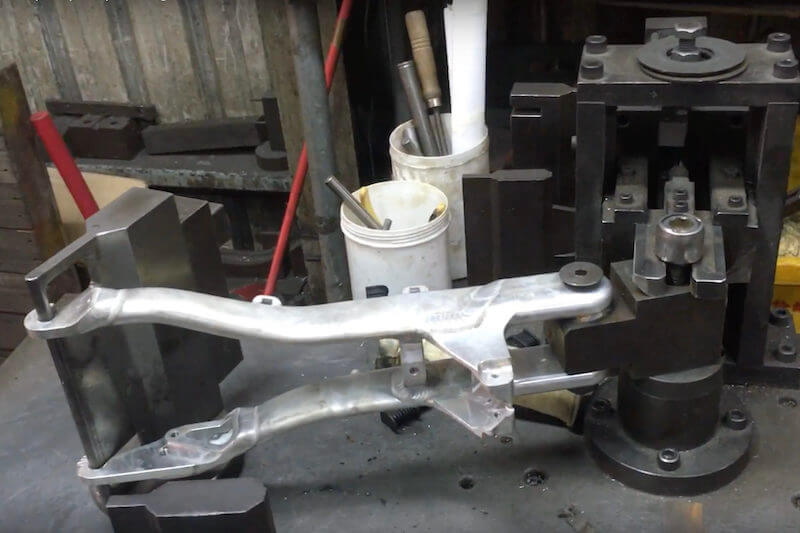
Testing
Throughout the manufacturing process, we rigorously test welded parts of the frame to make sure that they are built to last.
The fork testing shown below, for example, involves loading the fork with a force equivalent to 150kg for 100,000 cycles.
We also conduct tests on the electrical system to make sure that static charges or electrical interference don’t affect the function of the bike.
Heat treatment and alignment
Once welding is complete, the parts then get sent off for the next stage: heat treatment.
This is a series of heating and cooling processes. The first process softens the frame making it easier to align and the second process strengthens the frame.
The first process relaxes internal stresses introduced during welding. This means that when the frame comes back, everything is slightly out of place and needs to be re-aligned.
The alignment process is performed on an alignment table, which has what we call “jigs” which hold the parts in the correct alignment. The parts will then be bashed and bent into shape until they are exactly as we need.
Once we’re happy with the alignment, the parts are sent for a further round of heat treatment. This final step is an ageing process, which strengthens the material

Next: painting and assembly
The next part of the manufacturing process is the colourful part: painting! We will resume our three-part series on how the FLIT-16 is made here, as we take you to the painting and assembly factories to watch our first batch of FLIT-16s being built.
If you haven’t already, make sure you sign up below to get the next part of the FLIT story delivered straight to your inbox.
If you have any questions about the manufacturing process, please feel free to get in touch!
You can also check us out on Facebook, Twitter or Instagram for more.
Comments are closed.