As our riders will know, we’ve been working hard over the past few months on redesigning the FLIT-16 mudguards. It hasn’t been easy!
This is the tale of their development: we’ll show the good, the bad, and the ugly concepts, as well as the design challenges we faced along the way.
Most importantly, we’ll be sharing the final design with you for the very first time too!
The original mudguards
Why we chose curly:
If you’re familiar with the FLIT-16, you’ll be familiar with the current curly front and rear mudguards. They’re simple, easy to use, and most importantly they can be rolled up when not in use, allowing you to roll the bike when it’s folded.
We love the simplicity of the design: a flat rubber sheet with a metal strip at its core, using bistable technology (a fancy word for the same technology that snap bracelets use – if you were around kids in the 90s you’ll remember these being all the rage!). When pressed at the right point, the mudguard rolls up to tuck underneath the rear light.
The curly mudguards performed well in our initial testing, and they proved to be a hit with our test riders – so we thought we’d found a winner.
For the front mudguard, some of our riders may remember that we originally wanted a more conventional mudguard that hugs the front wheel. After lots of testing with wheel huggers, we realised that they weren’t a viable option: they couldn’t come down low enough on the front wheel to provide protection, without interfering with the fold and rolling the bike. We also wanted the design to be consistent between the front and rear mudguards.
We tested using both front and rear curly mudguards and they worked well, so double curly it was!
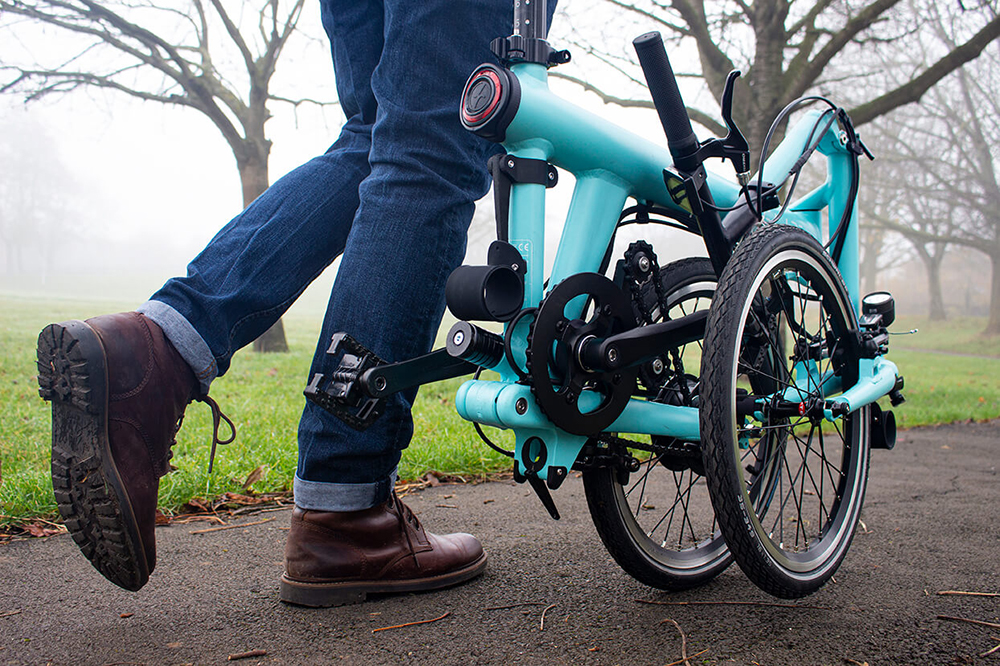
This is why we can’t use traditional mudguards on the FLIT-16. The mudguard needs to fold away so that it isn’t underneath the rear wheel when folding the bike (as this would stop you being able to roll it).
Other folding bikes get around this challenge by adding small castor wheels to the mudguard, but these aren’t great for rolling on uneven terrain (cobbles and pot holes are a no). By rolling the bike on its own wheels, you can roll anywhere you can ride.
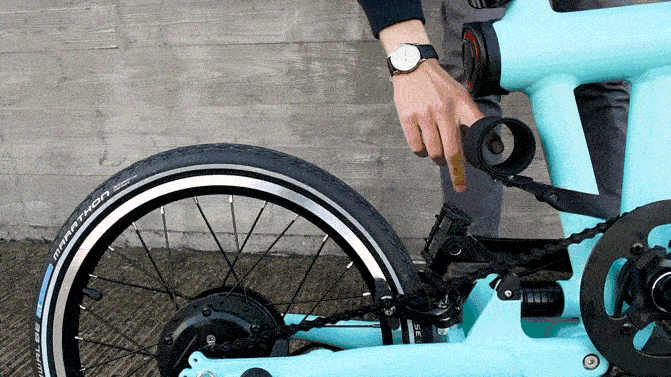
Challenge 2: where and how to mount the mudguard
We designed the FLIT-16 to be super compact, so that you can easily take it on trains, and store it at home or at the office. But, the compact size also means that there is less space for mounting a mudguard, and the rear lever (which you step on to fold the bike) needs to be easy to access.
Challenge 3: keeping the design consistent with the rest of the bike
The mudguard needed to reflect the clean, simple lines of the FLIT-16 – otherwise it would look out of place. This adds complexity when folding the mudguard.
One of our concepts (“The Golgi” – you’ll see why below), was a failed design that worked well in testing, but the look didn’t match the rest of the bike – and we weren’t going to compromise on that!


Challenge 4: manufacturing the mudguard
As you can see from The Golgi, some of our concepts were extremely complicated, making them difficult to manufacture and assemble.
Another concept that we worked on was inspired by the Deployable Structures Lab at Cambridge, which has worked on lots of interesting challenges with the aerospace industry (eg. on how satellites deploy in space) in recent years. This concept was made from a single sheet of plastic, and folded away using origami style folds. This was a cool concept, and the folding pattern would also add some curve to the mudguard, but folding it into the right shape consistently would have been a nightmare, and we weren’t sure how long it would last.
Back to the drawing board: rethinking the curly mudguard
After deciding that we weren’t going to take the above concepts further, we had a rethink. We really like the simple design and ease of use of the curly mudguard – how could we improve this design for better coverage?
The development process
We started experimenting with changing the length and angle of the rear mudguard bracket to see how this affected coverage. Dave (our Lead Engineer) would change the CAD of the bracket very slightly, then we 3D printed it, put it onto one of our demo bikes, and tested it in the biggest puddle we could find.
Some were better, some were worse, but we were learning: simply increasing the length didn’t seem to help much, but reducing the angle so that the mudguard was flatter, plus an increase in length improved it a lot.

After many tweaks, 3D prints, and muddy backs from testing – we found the right length, position and angle that provides excellent coverage from the biggest puddles and muddiest roads.

BUT – after all this, the usability wasn’t great: the mudguard obscured the rear light slightly and made it difficult to remove the battery from the bike. So we still needed to make some tweaks to the design.
To solve this, we added a hinge to the bracket, so that the entire mudguard could easily be folded out of the way when not in use.
The final design
The new hinged bracket design – provides excellent protection, allows you to roll the bike when folded, and remove the battery easily
The final design provides great protection in even the biggest puddles – Alex, our co-founder, even tested a prototype of the design whilst cycling around London in Storm Arwen, and didn’t get a spot of spray on his back.
What’s different:
- We adjusted the position of the bracket to be higher
- Increased the length of the bracket
- Reduced the angle of the bracket so that the mudguard is flatter
- We added a hinge in the bracket so that the entire mudguard folds away when you’re not using it
- The bracket will be made of metal, instead of plastic, for increased strength and durability
- The blade of the curly mudguard itself is the same as the original design, so you can re-use your current blade and retrofit the new bracket.
Below is a video showing how it works!
Timeline
We are currently prototyping a sample of the metal bracket. We will put this through one last round of testing before we place the order.
We are hoping that the brackets will be ready to send to customers in February next year.
How to get yours:
If you already have FLIT mudguards:
Please reply to our email to let us know and confirm your delivery address.
We will send you the new bracket when it is ready, for free, alongside instructions on how to install. It will be retrofittable onto your bike and current mudguard blade.
If you don’t have FLIT mudguards yet, but would like to order the new design:
The new design is available to order on our website here.
Please bear in mind that we are hoping to send these out in February next year.
Thank you!
Thank you to all of our riders for your continued patience while we worked on the redesign – we appreciate that it has been quite a long time coming, hopefully this blog post gives you an idea of the process we’ve gone through.
We hope you like the new design! We’re excited to send it out in the New Year.
If you have any questions about the mudguards, feel free to get in touch – we’re always keen to chat.